

Snap and salvage arc raiders Chasing a random loot drop across multiple raids without knowing exactly where to search wastes hours you could spend progressing faster. Snap and Salvage in ARC Raiders sends you across two layers of the Stella Montis facility for a photo, a set of papers, and two specific salvage items that don’t have a fixed spawn point. This guide breaks down every step, the best rooms to search, and what you’ll get once you deliver everything to Tian Wen.
What Is the Snap and Salvage Quest in ARC Raiders?
Snap and Salvage is a quest given by Tian Wen, unlocked after completing the earlier quest Cold Storage. The setup ties intoS tella Montis, ARC Raiders’ first post-launch map, with Tian Wen expressing interest in the technology hidden inside the facility rather than the broader mystery surrounding it.
This is one of the more involved early quests in the game, combining a fixed-location photo objective with two salvage items that spawn randomly across a set of rooms. Unlike a simple point-and-interact quest, the randomized drop mechanic means completion time varies significantly between attempts.
The quest can be completed across multiple runs rather than in a single raid, so partial progress carries forward even if you die or extract without finishing every step.
Full Quest Reference Table: Snap and Salvage
Here’s a complete breakdown of the quest’s requirements and rewards in one place.
| Detail | Information |
|---|---|
| Quest giver | Tian Wen |
| Prerequisite quest | Cold Storage |
| Map location | Stella Montis only |
| Objective 1 | Photograph any Rover in the Sandbox |
| Objective 2 | Search papers in the Security Checkpoint room |
| Objective 3 | Deliver a Magnetron to Tian Wen |
| Objective 4 | Deliver a Flow Controller to Tian Wen |
| Reward | 1x Burletta III |
| Reward | 1x Silencer II |
| Reward | 1x Extended Light Mag II |
| Reward | 100x Light Ammo |
| Recommended gear | Safe Pocket augment |
Keep this table on hand for a fast reference without rereading the entire walkthrough.
Step 1: Photographing a Rover in the Sandbox
Your first objective sends you to the Sandbox, a point of interest located near the center of Stella Montis on the map’s lower layer. The marker for this location only appears once you zoom in on your in-game map, so don’t assume it’s missing if you can’t spot it at a normal zoom level.
You’ll recognize the Sandbox by its distinctive open sand floor, and you’ll typically find a large Rover sitting in the southern section of the room. Approach the Rover directly, and a yellow interaction prompt appears, letting you snap the required photo with a simple interaction.
This area is fairly exposed with limited cover, and a Shredder Arc frequently patrols nearby. Clearing the immediate area with a grenade or ranged weapon before approaching the Rover reduces your risk of getting caught mid-interaction.
Step 2: Searching the Papers at Security Checkpoint
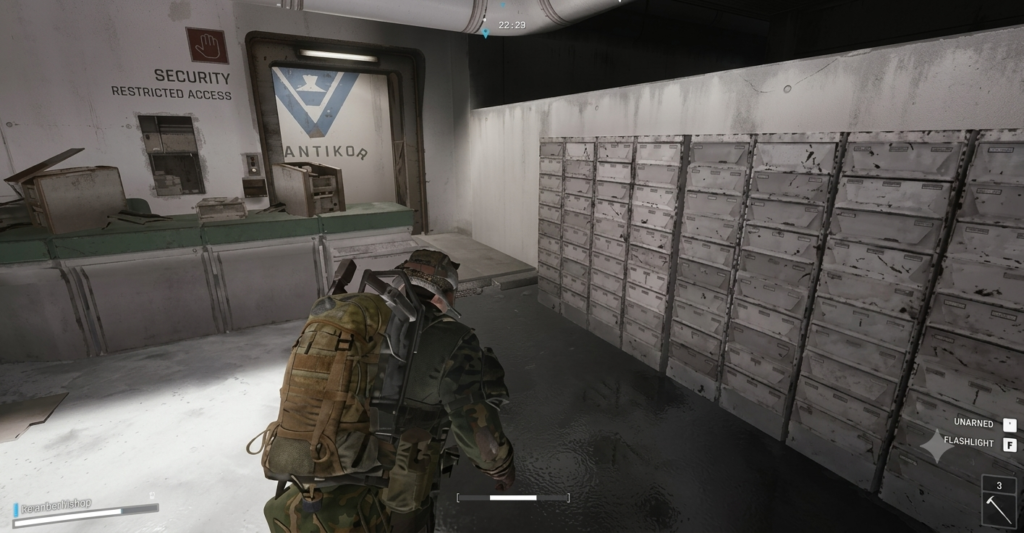
Once you’ve taken your photo, head to the Security Checkpoint room, located on the east side of the Lobby area. If you’re approaching from the upper floor, you’ll likely need to breach a locked door to reach the correct room.
Inside, make your way to the ground floor office within Security Checkpoint and interact with the papers sitting on the desk. This completes the second fixed-location objective, leaving only the two randomized salvage items standing between you and finishing the quest.
Unlike the Rover photo, this step has no combat threat directly tied to it, though Stella Montis as a whole can still contain roaming ARC enemies depending on your specific raid.
Step 3 and 4: Finding the Magnetron and Flow Controller
The final two objectives require securing a Magnetron and a Flow Controller, both of which function as standard Exodus material drops rather than fixed quest items sitting in a guaranteed location. This randomness is what makes Snap and Salvage take noticeably longer than a typical two-step fixed-location quest.
Search rooms along the corridor connecting the Atrium and Lobby areas for possible Magnetron drops, and check storage units and desks specifically inside the Security Checkpoint room for epic-tier Exodus material spawns. The Flow Controller has been reported inside desk drawers in the first-floor office of Security Checkpoint, making that general area worth searching thoroughly for both items at once.
Since these materials can drop across multiple raids, don’t feel pressured to secure both in a single run. Keep checking the same general rooms across repeat visits until both items finally drop.
Full Location Reference Table
Comparing all four objective locations side by side helps you plan an efficient route through Stella Montis. The table below lays out where to go for each step.
| Objective | Location | Notes |
|---|---|---|
| Photograph a Rover | Sandbox, lower layer | Southern section, watch for Shredder Arc |
| Search the papers | Security Checkpoint, east Lobby | Ground floor office desk |
| Find a Magnetron | Atrium-Lobby corridor, Security Checkpoint storage | Randomized drop, check multiple rooms |
| Find a Flow Controller | Security Checkpoint, first-floor office drawers | Randomized drop, check multiple runs |
Route planning around this table saves backtracking, since three of the four objectives cluster near the Security Checkpoint area.
Why You Need a Safe Pocket for This Quest
The Magnetron and Flow Controller behave exactly like standard Exodus materials once you pick them up, which means they’re vulnerable to loss the same way any other loot is if you’re eliminated before extracting. Losing either item after finally finding it means repeating that entire search process on a future run.
Bringing an augment with a Safe Pocket slot protects these two items specifically, keeping them secured even if the rest of your loadout gets stripped during a bad extraction. Given how much random searching goes into finding these two drops, protecting them once found is worth prioritizing over almost any other inventory consideration during this quest.
Equip your Safe Pocket augment before heading into any Stella Montis raid where finishing this quest is your goal.
Quest Rewards
Turning in both required items to Tian Wen completes the quest and nets a solid weapon-focused reward package. You’ll receive one Burletta III, one Silencer II attachment, one Extended Light Mag II, and 100 rounds of Light Ammo.
This reward set stands out for its immediate combat value compared to some of the game’s more augment-focused quest rewards. Having a weapon, a matching attachment set, and ammo ready to use means you can head straight back into a raid without needing to craft or purchase replacement gear first.
Deliver both required items to Tian Wen at Speranza once you’ve secured them to claim this full reward package.
Common Mistakes to Avoid
A handful of recurring issues slow players down more than the objectives themselves warrant. Avoiding these saves real time across multiple attempts.
- Forgetting to zoom in on the map to locate the Sandbox marker, since it doesn’t appear at standard zoom level
- Approaching the Sandbox Rover without clearing nearby threats first, risking an ambush from the area’s frequent Shredder Arc patrol
- Searching only one room for the Magnetron or Flow Controller instead of checking the full range of reported drop locations
- Skipping a Safe Pocket augment, then losing a hard-found Magnetron or Flow Controller on a bad extraction
- Rushing to finish in a single raid when the quest is designed to be completed across multiple runs without losing progress
Correcting even one or two of these habits meaningfully speeds up completion time.
Comparing This Quest to Other Stella Montis Quests
Stella Montis introduced several new quests alongside this one, and understanding how they connect helps with planning a more efficient run. The table below compares this quest against related early Stella Montis objectives.
| Quest | Giver | Focus | Relation to Snap and Salvage |
|---|---|---|---|
| Cold Storage | Various | Prerequisite quest | Must complete before Snap and Salvage unlocks |
| Snap and Salvage | Tian Wen | Photo, papers, two salvage deliveries | Current quest |
| Medical Merchandise | Various | Separate objective, dangerous areas | Can overlap in exploration route |
| With A Trace | Shani | Separate storyline, different map | Often completed around the same play session |
Players tackling multiple early Stella Montis quests in the same session often find their exploration routes naturally overlap, saving extra raids.
Tips for Completing This Quest Efficiently
A few habits make this quest faster and less frustrating across repeat attempts. These apply whether you’re rushing through or taking your time to loot along the way.
- Zoom in on your map before heading out, since the Sandbox marker won’t show at standard zoom
- Clear nearby ARC threats before approaching the Rover for your photo to avoid a mid-interaction ambush
- Search every room in the Atrium-Lobby corridor and Security Checkpoint storage on each visit, not just one location
- Equip a Safe Pocket augment before any run where securing the Magnetron or Flow Controller is your goal
- Spread the quest across multiple raids rather than forcing completion in one run, since progress carries over
Treating this as a multi-run objective, rather than a single-raid checklist, keeps the process far less stressful.
Frequently Asked Questions
How do I start this quest in ARC Raiders?
Short answer: The quest becomes available from Tian Wen after completing the earlier quest, Cold Storage.
Once unlocked, the entire quest takes place on the Stella Montis map, ARC Raiders’ first post-launch location. No special preparation is required beyond a Safe Pocket augment, which protects the two randomized salvage items once found.
Where do I find the Rover to photograph in Snap and Salvage?
Short answer: Head to the Sandbox point of interest near the center of Stella Montis on the lower layer, and interact with the Rover in the southern section of the room.
The map marker for this location only appears once you zoom in, so don’t assume you’ve missed it at normal zoom. Watch for a Shredder Arc that frequently patrols this exposed area before approaching the Rover.
Where is the Security Checkpoint room in Stella Montis?
Short answer: The Security Checkpoint sits on the east side of the Lobby area, and you’ll need to breach a locked door if approaching from the upper floor.
Once inside, head to the ground floor office and interact with the papers on the desk to complete this objective. This same general area also holds the best chances at finding the Magnetron and Flow Controller needed for the quest’s final steps.
Where do the Magnetron and Flow Controller spawn?
Short answer: Both are randomized Exodus material drops rather than fixed items, with the best chances found in the Atrium-Lobby corridor, Security Checkpoint storage units, and first-floor office desk drawers.
Since these are random drops, expect to check the same general rooms across multiple raids before securing both items. A Safe Pocket augment protects them once found, since they behave like standard loot vulnerable to loss on a bad extraction.
What rewards do you get for completing Snap and Salvage?
Short answer: Completing the quest rewards one Burletta III, one Silencer II, one Extended Light Mag II, and 100 rounds of Light Ammo.
This combat-focused reward set lets you head straight back into a raid without needing to craft or buy replacement weapon gear first. Deliver both the Magnetron and Flow Controller to Tian Wen at Speranza to claim the full package.
Can I complete Snap and Salvage across multiple raids?
Short answer: Yes, the quest is specifically designed to allow progress across multiple runs, so you won’t lose completed steps if you die or extract before finishing everything.
This matters most for the randomized Magnetron and Flow Controller drops, since finding both in a single raid isn’t guaranteed. Treat this as a multi-session objective rather than something you need to rush through in one attempt.
About This Guide
This guide was compiled using the official ARC Raiders wiki, verified gaming publication walkthroughs, and direct in-game observation, cross-checked for accuracy before publication. ARC Raiders continues to receive updates, so exact drop locations and quest details may shift over time.
Sources referenced:
- ARC Raiders Wiki, Official Snap And Salvage Quest Entry
- GameSpot, ARC Raiders Snap And Salvage Quest Guide
- PC Gamer, How to Complete Snap and Salvage in ARC Raiders
- GameTyrant, ARC Raiders Snap and Salvage Quest Guide
Ready to head into Stella Montis? Grab a Safe Pocket augment, snap your Rover photo first, and work the Security Checkpoint area thoroughly until both salvage items finally drop.